Terraform AWS EKS Module Lab: Build a Cluster Step by Step
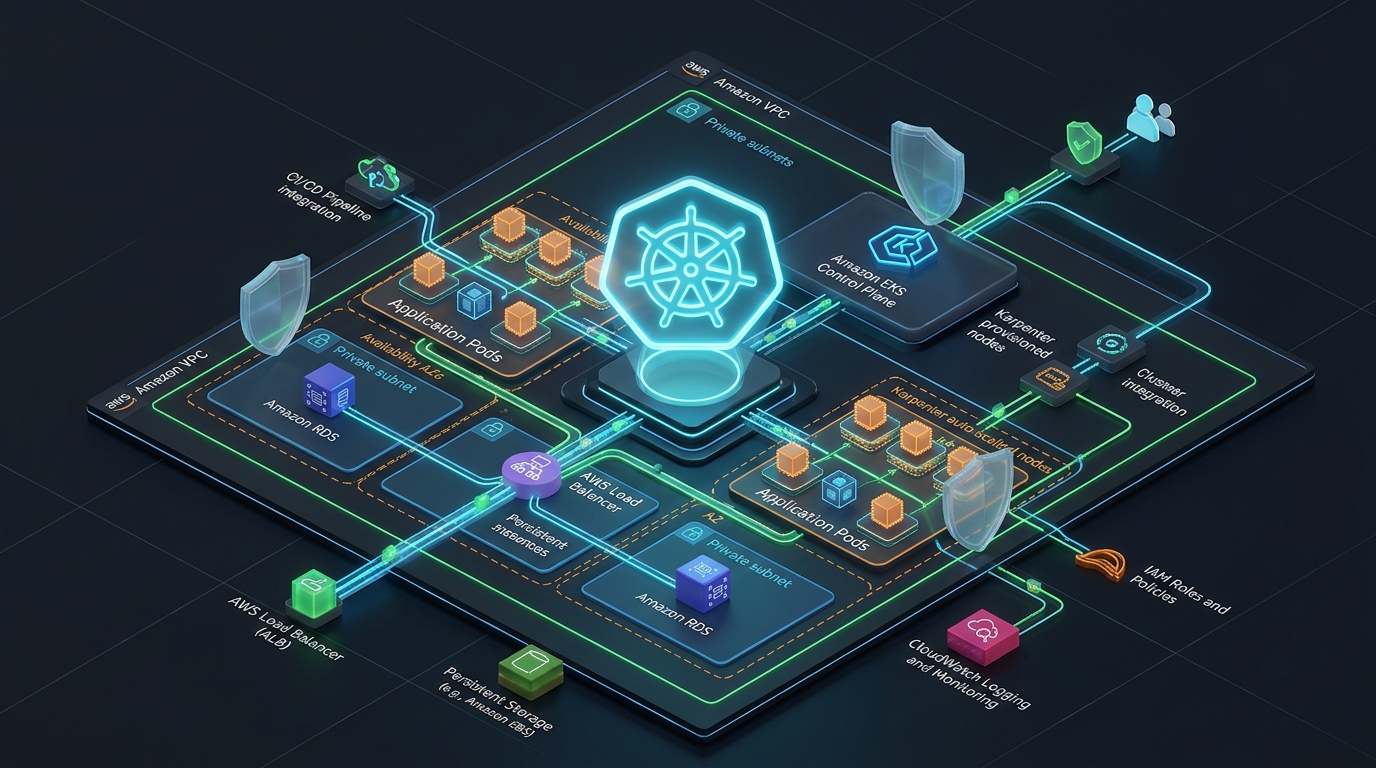
What the Terraform AWS EKS module lab builds
This Terraform AWS EKS module lab uses the terraform-aws-modules VPC and EKS modules to create a three-AZ VPC and an Amazon EKS cluster with a managed node group. You then connect kubectl, run a test workload and tear everything down. Plan on 15 to 25 minutes, most of it waiting while AWS creates the control plane.
It is a Terraform AWS EKS tutorial for learning, not a production blueprint. It uses one NAT gateway and a public API endpoint to keep the cost and the code short. The reasoning behind each production setting lives in the production EKS architecture guide; this page is the hands-on companion where you type the commands.
Still deciding between ECS and EKS? Read ECS vs EKS for startups for the cost and team-size trade-offs, or practise the EKS vs ECS interview question.
- A /16 VPC with three private and three public subnets and one NAT gateway.
- An EKS cluster with the CoreDNS, kube-proxy, VPC CNI and Pod Identity agent add-ons.
- One managed node group of two
t3.mediumnodes. - Admin access for the identity that runs Terraform, using EKS access entries.
Prerequisites and cost warning
You need Terraform 1.6 or newer (OpenTofu works the same way), the AWS CLI v2 configured for an account you can spend in, and kubectl. The IAM identity needs permission to create VPCs, NAT gateways, EKS clusters, IAM roles and policies, security groups, KMS keys and CloudWatch log groups. In a throwaway account an administrator role is the simplest option.
terraform plan and read it. The Terraform plan review guide lists the replacement and destroy traps worth checking, even on a lab.
Step 1: Create the project and provider files
Make an empty directory and add three files. The Terraform AWS EKS module version is pinned in step 3, and the VPC module version in step 2. Newer major versions of the EKS module renamed several inputs, so read the module's upgrade guide before you change a version constraint.
terraform {
  required_version = ">= 1.6.0"

  required_providers {
    aws = {
      source  = "hashicorp/aws"
      version = "~> 5.0"
    }
  }
}

provider "aws" {
  region = var.region
}variable "region" {
type = string
default = "us-east-1"
}
variable "cluster_name" {
type = string
default = "eks-lab"
}
variable "kubernetes_version" {
type = string
description = "Use a version that AWS lists under standard support."
}# Confirm this in the AWS EKS Kubernetes version calendar before you apply.
kubernetes_version = "1.33"The version has no default on purpose. EKS versions leave standard support on a schedule, and a default baked into a tutorial goes stale quietly.
Step 2: Add the VPC module
The VPC module creates the subnets, route tables, internet gateway and NAT gateway. The two subnet tags tell the AWS load balancer controller and the in-tree cloud provider which subnets to use for public and internal load balancers.
data "aws_availability_zones" "available" {
  state = "available"
}

locals {
  azs = slice(data.aws_availability_zones.available.names, 0, 3)
}

module "vpc" {
  source  = "terraform-aws-modules/vpc/aws"
  version = "~> 5.8"

  name = "${var.cluster_name}-vpc"
  cidr = "10.0.0.0/16"

  azs             = local.azs
  private_subnets = [for i, az in local.azs : cidrsubnet("10.0.0.0/16", 4, i)]
  public_subnets  = [for i, az in local.azs : cidrsubnet("10.0.0.0/16", 8, i + 48)]

  enable_nat_gateway   = true
  single_nat_gateway   = true # lab only: one NAT is cheaper but is a single point of failure
  enable_dns_hostnames = true

  public_subnet_tags = {
    "kubernetes.io/role/elb" = "1"
  }

  private_subnet_tags = {
    "kubernetes.io/role/internal-elb" = "1"
  }
}
Reading the availability zones from a data source keeps the code working in any region. The private subnets are /20 blocks and the public ones are /24 blocks, so the nodes have plenty of pod IP room. Plan the ranges before you apply: the CIDR subnet calculator shows how the blocks split, the subnetting speed challenge builds the habit, and the overlapping CIDR blocks interview question covers what breaks when a VPC range clashes with an on-premises network.
Step 3: Add the Terraform AWS EKS module and a managed node group
This is the core of the Terraform AWS EKS module setup. The module wraps the cluster, the IAM roles, the security groups and the managed node group (the aws_eks_node_group resource underneath) in one block. The cluster goes into the private subnets. enable_cluster_creator_admin_permissions gives the identity that runs Terraform admin rights on the cluster through an access entry. Without it you can create the cluster and then not be able to use it.
module "eks" {
  source  = "terraform-aws-modules/eks/aws"
  version = "~> 20.0"

  cluster_name    = var.cluster_name
  cluster_version = var.kubernetes_version

  vpc_id     = module.vpc.vpc_id
  subnet_ids = module.vpc.private_subnets

  cluster_endpoint_public_access           = true # lab only: restrict or disable for real clusters
  enable_cluster_creator_admin_permissions = true

  cluster_addons = {
    coredns                = { most_recent = true }
    kube-proxy             = { most_recent = true }
    eks-pod-identity-agent = { most_recent = true }
    vpc-cni = {
      most_recent    = true
      before_compute = true
    }
  }

  eks_managed_node_groups = {
    default = {
      instance_types = ["t3.medium"]
      min_size       = 1
      max_size       = 3
      desired_size   = 2
    }
  }
}
The Terraform AWS EKS node group settings live in the eks_managed_node_groups map: the instance types, the size range and, if you need them, labels and taints.
cluster_version later, follow the EKS cluster upgrade runbook.
Under the hood: the aws_eks resources behind the module
The module is a wrapper. Every setting in this lab maps to a plain Terraform AWS EKS resource from the AWS provider, and knowing the mapping helps when a plan shows a change you did not expect, or when you want to write the resources by hand. Search the plan output for these names.
| Lab setting | Terraform resource | What it does |
|---|---|---|
cluster_name, cluster_version, subnet_ids | aws_eks_cluster | Creates the control plane, with its IAM role, security group and log group |
cluster_addons | aws_eks_addon | Installs and updates the CoreDNS, kube-proxy, VPC CNI and Pod Identity agent add-ons |
eks_managed_node_groups | aws_eks_node_group | Creates the managed worker nodes with a launch template and a node IAM role |
enable_cluster_creator_admin_permissions | aws_eks_access_entry | Gives your identity cluster admin through an access entry and policy association, not the old aws-auth ConfigMap |
| Pod Identity agent add-on | aws_eks_pod_identity_association | Binds a Kubernetes service account to an IAM role. The lab installs the agent only; you create one association per workload |
For the Pod Identity associations there is a separate EKS Pod Identity module in the same family.
The Terraform AWS EKS provider setup stays the same as in step 1: the AWS provider, plus the Kubernetes and Helm providers when you manage workloads from Terraform. If a second Terraform configuration needs to talk to a cluster that already exists, read it with the aws_eks_cluster data source and the aws_eks_cluster_auth data source. Inside the same configuration, use the module outputs instead, so Terraform does not have to read a cluster that does not exist yet on the first apply.
data "aws_eks_cluster" "this" {
  name = "eks-lab"
}

data "aws_eks_cluster_auth" "this" {
  name = "eks-lab"
}

provider "kubernetes" {
  host                   = data.aws_eks_cluster.this.endpoint
  cluster_ca_certificate = base64decode(data.aws_eks_cluster.this.certificate_authority[0].data)
  token                  = data.aws_eks_cluster_auth.this.token
}
The token from aws_eks_cluster_auth is short-lived. For long applies and CI jobs an exec block that runs aws eks get-token is the safer choice, and the same pattern configures the Helm provider.
Step 4: Run terraform plan and apply
Add an outputs file so the next step can read the cluster name, then initialise, plan and apply the Terraform AWS EKS module configuration. Saving the plan to a file means apply executes exactly what you reviewed.
output "cluster_name" {
  value = module.eks.cluster_name
}

output "region" {
  value = var.region
}terraform init
terraform validate
terraform plan -out=tfplan
terraform apply tfplanThe plan should show a VPC, subnets, one NAT gateway, an EKS cluster, IAM roles, a KMS key, a log group and the node group. Apply typically takes 10 to 15 minutes. If it stops with an error, the table in step 6 covers the common ones. This lab keeps state on your machine. A team needs remote state with locking: see how to secure Terraform state files across environments and the multi-account Terraform architecture on AWS. If an apply stops halfway, the partially created resources recovery steps show how to continue safely.
Step 5: Connect kubectl and verify the cluster
Write the kubeconfig entry with the AWS CLI, check that the nodes joined, and run a small workload behind a load balancer to prove the subnet tags work.
aws eks update-kubeconfig \
  --region "$(terraform output -raw region)" \
  --name "$(terraform output -raw cluster_name)"

kubectl get nodes
kubectl get pods -A
You should see two nodes in Ready state and the CoreDNS, kube-proxy and aws-node pods running in kube-system. Now deploy a test service:
kubectl create deployment web --image=nginx --replicas=2
kubectl expose deployment web --port=80 --type=LoadBalancer
kubectl get svc web --watch
When the EXTERNAL-IP column fills in, open that hostname in a browser to see the nginx welcome page. If it stays on <pending>, check the subnet tags from step 2 and use the pending pod troubleshooting walkthrough to read the events. The Kubernetes troubleshooting module goes deeper on events and node conditions.
Step 6: Fix the common Terraform EKS errors
These are the failures people hit most often with the Terraform AWS EKS module, with the usual cause and fix.
| Symptom | Usual cause | Fix |
|---|---|---|
You must be logged in to the server (Unauthorized) | The identity running kubectl has no access entry | Keep enable_cluster_creator_admin_permissions = true, or add an access entry for your role, then rerun update-kubeconfig |
| Unsupported Kubernetes version on create | The version in terraform.tfvars is not offered in that region | Pick a version from the AWS EKS version calendar and apply again |
| Capacity or availability-zone error when creating nodes | An instance type is not available in one of the chosen AZs | Change instance_types or the AZ slice in vpc.tf |
Service stays on <pending> | Public subnets are missing the kubernetes.io/role/elb tag | Check public_subnet_tags in the VPC module and reapply |
terraform destroy hangs on the VPC | A load balancer or ENI created by Kubernetes still exists | Delete the LoadBalancer service first, wait for it to disappear, then destroy |
Step 7: Delete the test service and destroy the cluster
Order matters. Terraform does not know about the load balancer that Kubernetes created for your service, so remove it first or the VPC deletion will hang on its network interfaces.
kubectl delete svc web
kubectl delete deployment web
# wait until the load balancer is gone from the EC2 console, then:
terraform destroy
When it finishes, confirm nothing is left billing: aws eks list-clusters should return an empty list, and the NAT gateways and Elastic IPs pages in the console should be empty for the lab VPC. To estimate what a cluster costs before you run it, use the cloud cost calculator, and read how to reduce AWS costs without breaking production for the wider checklist.
Terraform AWS EKS Blueprints: when to use them after this lab
Once the base cluster works, the next question is how to install the controllers and add-ons around it. AWS IA, the aws-ia GitHub organisation, publishes the AWS IA Terraform AWS EKS Blueprints: a repository of cluster patterns, plus a separate Terraform AWS EKS Blueprints addons module that installs add-ons such as the AWS Load Balancer Controller, Karpenter and the metrics server with Helm.
Most of the patterns build on the same community EKS module you used here, so what you learned carries over. Read each repository's README for its current status and supported versions before you depend on it. For a comparison of the wider tool landscape, see the best Kubernetes tools for production guide.
Run the Terraform AWS EKS example from GitHub Actions
The Terraform AWS EKS GitHub repository is terraform-aws-modules/terraform-aws-eks, which includes examples for managed node groups, Karpenter and more. The same code is published on the Terraform Registry page for the EKS module.
To apply this lab from a pipeline instead of your laptop, authenticate GitHub Actions to AWS with OIDC and no stored access keys: the GitHub Actions OIDC for AWS guide shows the role and trust policy. Run terraform plan on pull requests and apply from the main branch. The interview question on running terraform plan inside a GitHub Actions workflow covers the review gate, and the GitHub Actions to ECR and Kubernetes guide covers the deploy side.
Frequently asked questions
Continue with the production design, interview practice and utilities that go with this lab.